

Wednesday, December 25, 2013
Wednesday, December 18, 2013
light in the house

One of our favourite activities to do during the Christmas season is to simply drive around our neighbourhood to see all the light displays along the street. Although there are many tree lighting ceremonies throughout the city, some of the most unique and inspiring ones are those around the block.
Every house meticulously prepared for the holiday season, showcasing a twinkle of lights like stars in the sky. The vibrant personalities of homeowners shine through as you drive by a lawn covered with displays of Santa, reindeer and a multicolour of lights. Or a quiet house with pretty winter wreaths, simple white lanterns, and a soft and subtle flicker of Christmas tree lights peeking through the front window.

As school pageants, concerts and parties bring in the joy, what strikes me the most is the diversity of this celebration, and how each of us celebrate holidays differently. Different traditions, rituals and food...all seemingly on a quest...to bring loved ones together.
Sometimes it's difficult to appreciate this or any "holiday quest". It's easy to get caught up with all the glitz of decorations and the glam of appealing storefronts enticing you to buy, buy, buy!
So this year, I decided to take a much more laid back approach...at least with my Christmas decorating. I used simple white ornaments to decorate the tree. I cut up some burlap for the garland. I just placed little white bows on our mantle garland.


Just as the lights on the neighbourhood houses represent the personalities of their homeowner, for me, beyond the "reason for the season", our lights represent a peaceful time to reflect and to be grateful for what we have at home.
Because no matter how many lights are displayed on the rooftops, driveways and sidewalks, it's what's inside our homes and the love within, that makes the light in the house, truly shine.
Simple Paper Tea Light Candle Holders
(for battery-operated tea lights only)

Inspired by the little porcelain ornaments that house some of the Christmas lights on my tree, I wanted to create something simple and easy to house my battery operated tea light candles. (please use battery operated for this craft...we don't want any fires started!). This also makes a sweet little Christmas themed night light for a child's room, with little cost and effort.
Tools
- Wedding favour gift boxes (found at Michaels or your local dollar store).
- Ruler
- Scissors/exacto knife
- Hole Punch
- Battery operated tea light candles
Directions
- Open the boxes until it is flat.
- Using a ruler, draw out the roof (at the top of the box). Draw out the door and windows, or just hole punch (using various shaped holes, if desired).

- Cut along the lines.
- Assemble the box.
- Place the battery operated tea light candles inside.
Wednesday, December 11, 2013
pockets of joy

This year, December started early. At least it seemed to start early for me. I don't know where the time flew, but I recall telling myself that I had lots of time before the holidays arrive. Our daughter started requesting those Turtle chocolates for her "pockets" (I thought she was referring to her coat pocket...and since when did she like those kind of chocolates?). Then last Monday, my son asked me..."What ever happened to our annual advent calendar?"
You see, every year I place chocolates in the tiny square pockets of our little felt snowmen advent calendars. It's a tradition that we've had since the kids were old enough to consume candy, and I loved the fact that I can control what goes into those pockets (sometimes I put stickers instead of sweet treats!). I guess it was my little way to ensure that I don't stumble upon sugar-crashed-children sprawled on the sofa covered with thirty chocolate wrappers.

This year, I completely forgot those calendars. The tree was set up, the lights on our mantle completed, and the outdoor lights done and displayed before the Santa Parade a few weeks ago, but... the calendars!
It's amazing how little traditions that I thought would go unnoticed, would resonate so much with the kids. I would never have imagined that they would remember this little ritual that occurs every December. And those Turtles chocolates that our daughter was asking about? It turns out when she eats them, it reminds her of her grandparents (both Grandpas LOVE those chocolates).
It goes to show that those little gestures sometimes mean a lot more than you know. I guess it's not just what's in those pockets that matter, but the thrill of peeking in them that makes those little pockets of joy...a sweet moment to remember.
Candy Cane Chocolate Toffee

Ingredients
- 1/3 c sugar
- 4 tbs unsalted butter
- 2 tbs water
- 1/4 tsp salt
- 1 cup chocolate chips
- 1/4 cup of candy canes, crushed.
- Combine sugar, butter, 2 tbs. water and salt in a small saucepan.
- Cook on medium-high heat stirring until the sugar dissolves and the butter melts.
- Stop stirring and cook until the colour turns caramel-like brown.
- Pour onto a baking sheet lined with parchment paper or a silicone mat.
- Sprinkle the chocolate chips immediate so it will melt. Smooth gently with the back of the spoon or icing spatula.
- Once the chocolate covers the toffee smoothly, sprinkle the crushed candy canes.
- Let it cool completely.
- Cut into little squares.
Enjoy!
apples to apples

When I was asking our son what he wanted for Christmas, he rhymed off a few things on his list, but he appeared most interested in getting a new board game. So when Mattel sent the "Game On" box for us to try a few of their games, my son was thrilled...the first game he wanted to play was "Apples to Apples".
It was new game (to me), but my son mentioned that a classmate brought it along on their school overnight camping trip earlier this year, and it was something that the kids really enjoyed playing. It was one of the best "quiet time" activities they had during their trip.
So when I opened the box, my son explained the rules of the game, and we played a few rounds. Our daughter was off at a playdate, so I didn't think this would last too long, but it easily became an addictive game, and I knew this would be a classic family game to play over the holidays.

Since that night, my son has asked (almost pleaded) to play the game with us again and again. Unfortunately our schedule was too busy for all of us to sit together for any extended period of time, so we had to wait until this past weekend, when all four of us were able to sit together.
What started out as a quick ½ hour session to teach our daughter how to play the game, turned into an afternoon of family bonding. It was so nice to see the kids OFF of their electronic devices, even for just a few hours. We had hot cocoa and great conversation, and now I know why our son had insisted that we play "Apples to Apples".

It reminded him of all the quiet times we spend together, like we do at the cottage, sipping hot cocoa and just relying on each other's personalities and wit to keep each other company and entertained. Just like his school trip, it created a wonderful moment to remember, a peaceful time without drama or stress.
Now it's clear why my son wanted a board game. Although the flashy electronic devices are a lot of fun (yes, those were on his list too!), the board game gave us quality time to spend together as a family.
And no other electronic toy can really compare to that.
A great big thank you to Carli for providing the Mattel "Game On" Box for our family to enjoy. Visit Mattel for more board games for great family Christmas gift ideas.
Wednesday, December 04, 2013
dancing gingerly

I often think of that snow dance scene in Tim Burton's movie, "Edward Scissorhands", when Edward creates a flurry of snowflakes as he makes an ice sculpture for the girl he loves. She freely dances in the gently falling snow, eyes closed and arms wide, without a care in the world. During the Christmas holidays last year, it was the first time our kids saw this movie. They were immediately entranced and loved how innocent an adult like "Edward" can be.
 |
| {source} |
For me, the fresh snow is a whimsical reminder of all the winter and Christmas holidays of years past. The fondest memories are when we were young children. The glorious days when you tried to sleep (but couldn't) on Christmas Eve...wondering if you could wake up at midnight to catch the presents being placed under the tree. The innocence of waking up earlier than ever and sneaking downstairs to gingerly shake the mystery presents. The crackling sound of wrapping paper being torn, then playing with your new treasures as the smell of turkey wafts through the house.

I love experiencing Christmas or any holiday through the eyes of a child. But as each year passes, I grasp at finding ways to keep that magic in their eyes, creating as many magical holiday memories for them so they too, can look back fondly at Christmas as a time of happiness and security. I don't think I'm ready for them to grow into that age where they only want cash for gifts. I think deep down inside of me, I still want them to open toys...something. Not because it's about the gift, but it's about how they feel at that very moment when the wrapping paper is finally torn off to reveal the treasure inside. Because I love to watch their faces light up with pure excitement and exhilaration. And as we get older there are fewer and fewer opportunities to have that singular moment of pure and innocent joy.
I guess I want them to continue to see the magic of Christmas because I enjoy re-living it again and again through my kids. And as much as I want them to be independent, amazing, world changing adults when they grow up, maybe I'm not ready for that "grown up" part yet, and I want to be able to enjoy this young moment just a little bit longer so I can remember how it feels to be a kid.

Soon they'll pass that stage when they will no longer want to decorate gingerbread houses or leave cookies and milk for Santa, and maybe I too, will no longer want to do those things. But until then, I will savour watching them consume all things gingerbread and cookies.
Or maybe I will too, just freely dance in the snow with them...enjoying the moment.
Bottom Layer
Ingredients:
Or maybe I will too, just freely dance in the snow with them...enjoying the moment.
Bottom Layer

Ingredients:
- 1 (3.5 ounce) package cook and serve
- butterscotch pudding mix
- 1/2 cup butter
- 1/2 cup packed brown sugar
- 1 egg
- 1 1/2 cups all-purpose flour
- 1/2 teaspoon baking soda
- 1 1/2 teaspoons ground ginger
- 1 teaspoon ground cinnamon
Directions:
- Preheat the oven to 350 degrees F (175 degrees C). Line 9x9 square pan with parchment paper.
- In a medium bowl, cream together the dry butterscotch pudding mix, butter, and brown sugar until smooth. Stir in the egg. Combine the flour, baking soda, ginger, and cinnamon; stir into the pudding mixture.
- Press onto a baking pan, approximately 1/2 inch thick.
- Bake for 15-20 minutes in the preheated oven, until firm but still slightly soft.
- Let cool.
Top Layer
Ingredients:
Ingredients:
- 2/3 cup sweetened condensed milk
- 1/2 cup brown sugar, packed
- 1/2 cup butter
- 1/4 cup corn syrup.
Directions:
- Combine all 4 ingredients in a large saucepan.
- Bring to boil on medium. Boil for 3 minutes, stirring constantly.
- Remove from heat and stir for 1 minute.
- Pour over gingerbread layer. Spread evenly.
- Let stand in pan for about 4 hours until cooled completely.
Cuts into 24 squares.
Wednesday, November 27, 2013
sweet and simple

When the Santa Clause Parade comes to town, it's a sign to begin gearing up for Christmas. Storing away the autumn decor to set up the tree, stringing up the lights outside the window, starting on the holiday baking...all the magic of the holidays.
After attending the big city parade last year, we decided to tone it down this year, and meet up with friends and go to the local one in town. Although the weather was much colder than previous years (it was around -15 degrees!), and the parade wasn't as professionally coordinated as the one we saw last year, I really enjoyed the simple pace this time around.

As much as I would love to go to the legendary Macy's parade in New York, there is something quite sweet about watching small floats proudly displayed by local schools or associations...the ones that don't have the most lights and fancy costumes, but has all the twinkle of effort and anticipation for this beautiful season.
Hand written signs, parent-sewn costumes, and horse drawn carriages show a sense of pride, and it's easy to forget how meaningful it is to contribute to the local community. These floats showed heart and community spirit...not a national brand campaign from a large corporation.

I think this year's local parade was a nice transition for our family, into the busyness of the upcoming holiday season. We didn't have to fight for a spot to sit down, everyone was courteous and polite, and afterwards we enjoyed our friends company for hot cocoa and simple but warm comfort food in our home.
I'm not sure how many more years we'll have, until the novelty of attending the Santa parade starts to wear off, especially for our oldest child. Maybe we'll have to go see bigger, flashier productions in the future but for now, I hope this year's parade has set a precedent for the kind of Christmas season we'll have ahead of us...


...sweet and simple.
Easy Marshmallow Pops
(makes about 30 pops)

Ingredients:
- Large Marshmallows (about 30)
- ½ cup Peppermint Chocolate Chips (I used the President's Choice ones)
- ½ a bar of dark organic chocolate bar (approx. 50g), chopped
- Toffee bits (I used Chipit's Skor toffee bits, found in the chocolate chip aisle...you can use sprinkles, coconut or any other crushed candy or cookie you desire).
- Toothpicks (I liked using the frilled ones in various colours, so you can distinguish the different flavours...small candy canes work too).
- In a small glass bowl, microwave the chocolate chips on medium for 2 minutes. Stir vigorously until smooth (heat again on medium for another 30 second increments, if needed, stirring inbetween).
- In another small glass bowl, microwave the chopped chocolate bar on medium for 2 minutes. Stir vigorously until smooth (heat again on medium for another 30 second increments, if needed, stirring inbetween).
- Let the chocolate cool a minute. Stir the chocolate to ensure it's still smooth.
- Place wax paper on large plates.
- Place toffee bits onto a plate.
- Insert toothpick in marshmallow then dip and swirl into the chocolate. Then dip into the toffee bits.
- Place on the wax paper.
- Cool at room temperature for 4-6 hours or place in the fridge for at least 15 minutes.
Best served with hot chocolate.
Wednesday, November 20, 2013
sticking out

Growing up in a small suburb, I was one of those children who didn't quite fit into the norm of what your average Canadian girl looked like.
With immigrant parents, it was equally as difficult to balance the two worlds that I lived in....the world that held onto the roots and heritage of previous generations, and a world that I was born into--a world that at times, didn't quite respect or understand those roots.
As a child, on the odd occasion during Hallowe'en, my friends and I would receive "white rabbit" candy (it's a taffy-like candy originated from Asia) from a neighbour, and when we would go through our loot, there would be strange remarks about this exotic treat, often ridiculed that it was "weird" and they wanted to give them away. And of course to look "cool", I'd play along pretending not to know too much about that candy, so I gathered theirs so I can "get rid of them later". But deep down, I thought to myself, if those kids only knew how amazingly sweet and yummy those candies were...I guess I benefitted from what they didn't know.

We often take our past experiences, especially childhood ones, and apply them to our own children. If we were bullied as a child because of our "differences", now as parents, we try to make sure our children assimilate a little more, so they don't suffer the same negative experience. Or if we didn't fit in because we didn't play the sport that every other kid in the class did, as parents we try to force our kids to do those very same sports, so they don't feel left out like we did.
As tempting as it is to try to make our children's lives "easier", I don't know if this is the right approach. I think growing up "different" has made me learn to try to accomplish even more. To fight harder and be even more distinguishable. In fact, because I was different, I wonder if I was heard more often and took on more leadership qualities because I wasn't drowned out in the mediocrity of being part of a pack.
This year, when I was going through Hallowe'en candy, I found a few traditional Chinese candies in red packages, sticking out amongst the chocolate bars and caramels and I wondered what my kids would do with them.
They didn't even flinch and put them in their pile to keep. I guess they're much further ahead than I was when I was their age, as they've learned to embrace all things...both the common and different. And they know that different can be sweet.
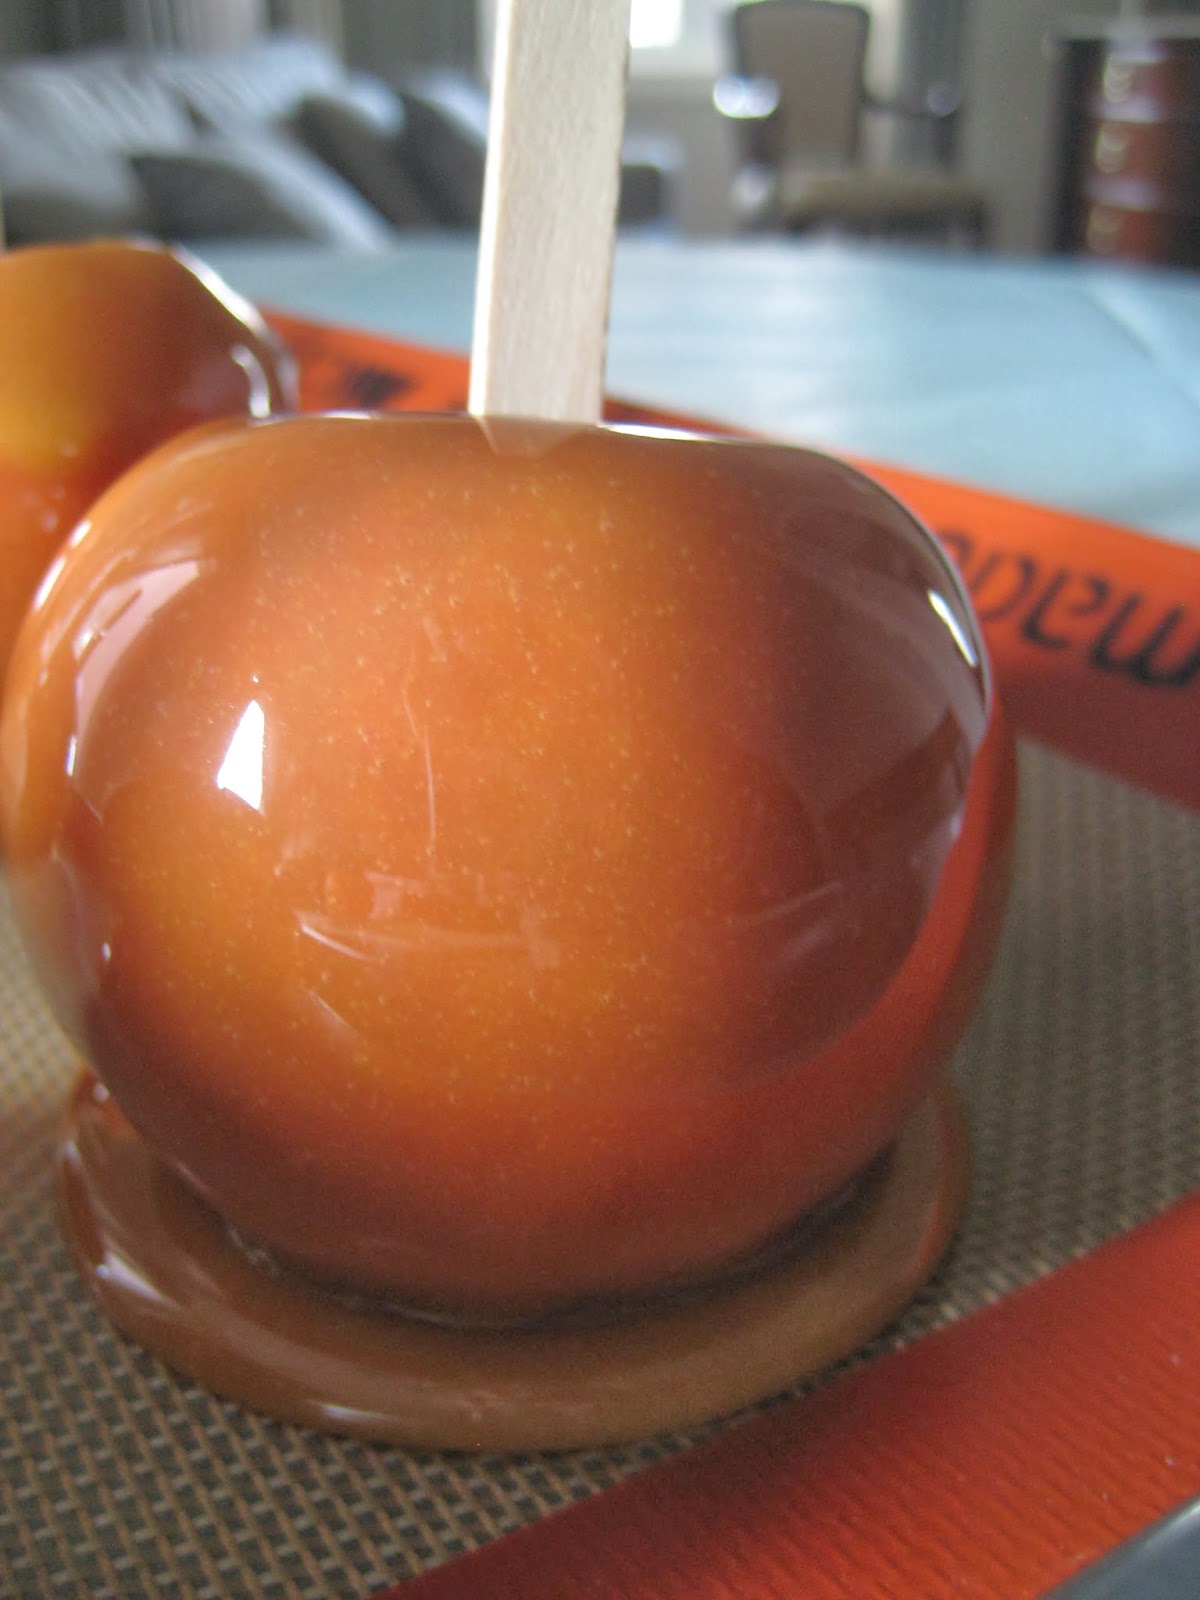
Caramel Apples with Chocolate Drizzle

Ingredients
- 2 C brown sugar
- 1 C corn syrup
- 1/2 C butter
- Vanilla
- Approximately 6 large apples. (any kind would do)
- 1 can sweetened condensed milk
- 1 piece of Baker's Chocolate, melted
- Popsicle sticks
- Combine the sugar, corn syrup and butter in a small pot and heat on medium on the stove until the butter is melted.
- Stir constantly, then add 1 tsp. vanilla
- Remove from heat and continue stirring until a thin consistency.
- Stick a popsicle stick into the top of the apples.
- Dip apples into the caramel.
- Set apples on a cookie sheet or silpat.
- Place in refrigerator for about 15 minutes.
- As the caramel hardens in the fridge, melt the baker's chocolate in the microwave for 2 minutes on low until soft. Stir until melted.
- Using a spoon, drizzle the chocolate onto the apples.
- Refrigerate for at least 15 minutes or until chocolate hardens.
Enjoy!
Wednesday, November 13, 2013
winter is stewing

A few days ago, there were snow squall warnings in our area, and weather reports warned us of snow heading our way with messy driving conditions.
When I hear the word "snow", I begin my preparations for the long winter ahead.
It's a sign to get the winter boots out. It's a sign to make sure all the winter coats, hats and gloves are ready to go....and to make sure the snow gear for the car is primed and ready for good use.

I began working on our Christmas cards and stumbled upon some photos of the snow from last winter. The snow looked so beautiful, and for a brief moment (very brief!), I looked forward to seeing white covered rooftops, admiring the twinkling of the light reflected on the snow as we drink hot cocoa and eat comfort food. I love how the cold temperatures gives us many opportunities to cuddle and spend time with each other.
Although the snow still hasn't arrived yet, you can feel it's just around the corner. While we can feel the winter season stewing in the air, we will be ready for it...with our own kind of stew.

Slow Cooker Beef Stew
Ingredients:
- 1 lb. beef stew meat
- 1 lb. potatoes, cut in 1" chunks
- 4 organic carrots, cut in 1" chunks
- 1 onion, chopped
- 2 garlic cloves, diced
- 1 can of chopped tomatoes, undrained (I use the "unsalted" versions)
- 2 stalks of celery, cut into 1" chunks (I didn't have it on hand this time...it is fine without it, but much more flavourful with it)
- Spices: thyme, oregano, black pepper, salt (to taste)
Stir all the ingredients together in the crockpot and cook for 12 hours on low (or 6 hours on high).
Enjoy.
Enjoy.
Wednesday, November 06, 2013
each peach pear

Our basement renovation this past summer forced us to make decisions on what we really should keep and what we should donate or purge. I don't know how other people feel when purging, but when I go over some of the old toys or children's books that my kids have outgrown, sometimes I have "issues" with letting some of those items go.
I know...those are just things, right? That we should't have sentimental ties with objects and just learn to keep the memory in our hearts.

But as I run my fingers along the worn edges of some of those old board books, the favourites that my kids read over and over again, like "Each Peach Pear Plum" or any of the Sandra Boynton books, I can almost quote them verbatim without opening the cover, and when I do, I'm transported once again to those early years when the kids would touch and feel the books, absorbing all that is new.
It all started here.

Now, the stories that capture their imagination are books well beyond what I'd ever had read at their age, and I love how they embrace the genres that was never quite part of my repertoire...science fiction, fantasy or adventure, and voraciously consume each word of their prized novels like delicious desserts for the mind. Food for their soul.
So for now, I might keep a few well selected books, just for me. Just as a reminder of how far they've come on their own journey and how much they've evolved from "Each Peach Pear Plum". They've added their own flavour to their reading tastes, and I will just continue feeding them with new adventures that await them on the bookshelves. Maybe one day I will learn to let go of those old books and take the lead from my kids and just be inspired to open new chapters with exciting adventures...and discover my own new flavours.
Peach Pear Blueberry Cobbler
(adapted from: Guy Fieri's "Cin-Ful Peach Cobbler")

I had a lot of fruit left over that needed to be consumed. I was originally going to make a peach galette, but didn't have quite enough peaches. This recipe was blindly adapted to include whatever fruit that I had on hand. It turned out great.
Ingredients
For the filling:
- 1/4 cup brown sugar
- 1/4 cup white sugar
- 1/2 cup all-purpose flour
- 1 teaspoon ground cinnamon
- 1/4 tsp. allspice
- 1/4 teaspoon salt
- 4 peaches, peeled and sliced.
- 1 pear, peeled and sliced (I used Asian pear, which is on the watery side. Bosc pears would work well too).
- 1 pint of blueberries.
- 1 teaspoon cornstarch, dissolved in 1 tablespoon water
- 1 lemon, juiced (4 tsp.)
- 1 tsp. almond extract (optional)
- Butter to grease dish
- 1/3 cup brown sugar
- 2 tbsp. cup sugar
- 1/3 cup all-purpose flour
- 1/3 cup quick oats
- 12 tbsp. cup slivered almonds
- 1/4 teaspoon freshly grated nutmeg (optional)
- 1/2 teaspoon ground cinnamon
- 1/4 cup unsalted butter, room temperature, cut into 8 pieces
Directions
Preheat oven to 450 degrees F.
To make the peach filling:
- In a large bowl, stir together sugars, flour, cinnamon, nutmeg, and salt.
- Add peaches and gently toss to coat.
- Mix the cornstarch with water until a slight paste, add almond extract and lemon juice.
- Stir into peaches to incorporate.
- Butter a 9 x 9 baking dish and add peach mixture.
- In a medium bowl, combine all dry ingredients but the butter.
- Add in butter pieces and combine with hands until crumbly.
- Top peaches with half of the crumb topping.
- Place in oven and immediately reduce oven temperature to 350 degrees F.
- Bake uncovered for 30 minutes, then add remainder of the crumb topping.
- Reduce heat to 325 degrees F and bake until golden and bubbling, another 45 minutes.
- Remove from oven and let sit for 15 minutes before serving.
Enjoy.
Wednesday, October 30, 2013
sowing the seeds

This has been a interesting school year so far. I think the kids are starting to come into their own, and find their groove with the rhythm of homework, extra curricular activities and social lives.
Although we are still very involved with supporting their achievements, both academic and social, it seems like we've started to "let loose" a little. To let the kids make their own mistakes...to not continuously remind but let them forget on occasion, to bring their homework to school. Or to stop hounding them to complete an assignment and let them scramble and complete it at the 11th hour.

As a parent, the role of "protector" is so ingrained in us, that it's hard to let go of wanting to micromanage our kids. Let's face it, it's sometimes unbearable to watch them stumble because in our minds, it feels like we've failed them.
However, I think we really fail our children when we try to protect them too much. The difficulty is trying to reassure ourselves that it's OKAY to (once in a while) let our kids feel that sting that comes with consequences.

I've always said that the hardest part of being a parent is learning to let go. As much as it's difficult to do, I will have to keep reminding myself that they need to strive to overcome obstacles and learn from those mistakes.
Right now we're just sowing the seeds...so they can grow and become stronger.
Sweet and Salty Roasted Pumpkin Seeds

Roasted pumpkin seeds are a great healthy snack. This recipe combines both salty and sweet recipes that I've used in the past. To make these sweet, omit the salt and pepper. To make these salty, omit the sugar and cinnamon and replace the butter with olive oil.
Ingredients
- 2 cups fresh pumpkin seeds (from 1 large or 2 medium size pumpkins), rinsed.
- 2 tablespoons unsalted butter, melted
- 2 tsp. brown sugar
- 3/4 tsp. salt
- ½ tsp. pepper
- ¼ teaspoon ground cinnamon
Directions
- Preheat the oven to 300° F.
- Spread the seeds on a silpat or parchment paper lined baking sheet and bake until dry throughout, 50 minutes. (or you can skip this step if you dry the seeds overnight, spread out on a baking sheet)
- Increase the oven temperature to 350° F.
- In a large bowl, toss the seeds with the butter, sugar, salt, pepper, and cinnamon.
- Return the seeds to the baking sheet continue baking, tossing occasionally, until the seeds are golden brown (approx. 10 to 15 minutes.)
Enjoy.
Wednesday, October 23, 2013
all that matters

With the economy still in flux and the general population holding onto work and wages to meet the demands of raising a family, sustaining a lifestyle, or just to make ends meet, there has been a lot of talk about how global economics are changing and how people (women in particular), need to "lean in" to succeed.
I know I'm quite late in the discussion of "leaning in"...it's been discussed in countless of articles that either validate or debunk the question if it is possible for women to "have it all". But sometimes I wonder if there is a bigger question, that's not gender specific, that we really should be asking?
As a society of responsible adults, maybe we should re-examine the idea of what "all" is? Does having it all mean working exhausting 14 hour jobs to have 90 inch flat screen televisions, luxury cars that outnumber the drivers in the house, and mortgaged-to-the-hilt mansions filled with more stuff?

What exactly are we striving for? And worse, what message about self worth are we telling our kids?
Sometimes I wonder if "having it all" really means "keeping up appearances". I remember watching a documentary on the decline of manufacturing in North America, where in one scene, a man who already owned 6 televisions in his house, bought another mammoth one because it was "so dirt cheap". What value are we teaching when we make so many sacrifices (hard work to make these purchases, scarce available space in the house, over consumption of electricity, more time spent in front of a screen and less with each other) just to own a $200 flat screen TV?
I'd like to start a new movement...called "having all that matters". Because I don't think having every single one of those things are definitions of "success". And while I believe all of us should pursue our own personal goals, whether it's a career or lifestyle goal, we should really be asking ourselves, to what end are we doing this? At the end of the day, what exactly are we bringing home?

Although I don't have 6 flatscreen TV's, with my own definition, I guess I really "have it all", because I have what matters to me and I know exactly what I have at home.

And that's something we can ALL strive for.
"All That is Sweet Cookies"
(Maple Banana Peanut and Chocolate Chip Cookies)
(Maple Banana Peanut and Chocolate Chip Cookies)
Adapted from the Kraft Peanut Butter Cookies
(makes about 12-15 cookies)

Trying to name these cookies was a task in itself, as it had all of the yummy qualities of what sweetness means to me. The Canadian influence of maple syrup. The peanut butter and banana qualities of a morning breakfast treat...and chocolate. As sweet and rich as this sounds, there are no refined white sugars, so it's not as lethal sounding as it seems.
Ingredients
- 1 cup smooth peanut butter (I used all-natural peanut butter: warning, it makes the cookies dough texture more "wet" when mixed).
- 1 ripe banana, mashed
- 1 tsp vanilla extract
- 1 tsp. baking soda (optional...this makes the cookie more "banana bread" like in texture)
- 1 egg
- 3 tbsp. pure maple syrup
- 1/2 cup organic chocolate chips
- Heat oven to 325 F.
- Mix together peanut butter, banana, vanilla and baking soda until smooth.
- Add egg and maple syrup .
- Gently fold in chocolate chips.
- Drop tablespoons onto cookie sheet.
- Bake for 20 min. or until lightly browned. (Do not overbake.)
- Cool completely.
Pair with milk or enjoy on it's own.
Wednesday, October 16, 2013
the gift that keeps on giving

It is always a time of reflection...it's a time I hope my children will one day, think of when they are having troubles or worries...to be grateful that we generally live healthy and happy lives, and there are so many things that we have that many people do without.

Unfortunately October is also a time where consumerism takes over, and the world seems overwhelmed more with costumes and light up pumpkins. When I was purchasing a few last minute flowers and decorations for Thanksgiving, the sales person keep pushing the sales of costumes and the like...I responded that I wanted to enjoy Thanksgiving first...thank you very much.

As years go by, I have started to notice that Thanksgiving celebrations aren't really celebrated (or "promoted" in marketing terms) as much in the stores any more. It's like we go straight from back to school to Hallowe'en. Sure there are some nice fall wreaths, pumpkins and the like, but when I was trying to get a large (to feed my 15+ crowd) turkey, the store managers said they didn't order as many this year, and I was hard pressed to find a turkey that would suffice (and also be large enough to keep on giving after the big day, with leftover turkey for pies, soups etc.). I was thankful this year I did find one.

I don't know where the fundamental cultural shift occurred, because Thanksgiving is not about religion. It's about being truly thankful for the opportunities we have. The fundamental basics of humanity, such as food, water, shelter, clothing, education, safety...things that we ALL should be thankful for, no matter what spiritual path (or not) that one takes.

I am so very thankful for the family and friends that I have. And even if Thanksgiving celebrations don't appear to be treasured by the "commercial world", I will always treasure this time of year, because it reminds me to be grateful that I am able to share this time with the ones I love. A love that is the true gift that keeps on giving.
Turkey Pot Pie
(serves 4-6 people)

This recipe can be a bit time consuming, but it's totally worth it and uses up most of the main Thanksgiving leftovers (turkey, peas, carrots, turkey stock, etc.), especially if you make more than one pie. I usually double or even triple the recipe below...one to eat the day after Thanksgiving, one or two to freeze for another night.
Pie Crust
- 2 1/2 cup of flour
- 1/4 tsp. salt
- 1/2 cup butter (cubed)
- 1/2 cup vegetable shortening (cubed)
- 3-4 tbsp. cold water
- In a large bowl, mix the flour and salt together.
- Cut in with a knife or pastry blender, the butter and vegetable shortening.
- Blend together until a pea-sized crumb mixture forms.
- Slowly add cold water until just moistened.
- Form loosely in a ball and refrigerate for 30 minutes while you're making the turkey filling.
- 1 1/3 cups peas and carrots
- 1 tbsp. finely chopped leeks
- 1 tsp finely chopped garlic
- 2 tablespoons butter
- 1/4 cup all-purpose flour
- 1/2 cup turkey stock (I used the turkey stock I made with the the giblets, onions, carrots, celery and herbs...chicken stock would do here).
- 1 1/2 cups milk (or table cream)
- 1 teaspoon dried thyme (or 1 tbsp. fresh), to taste
- 1 tsp. poultry seasoning (optional)
- 2 cups diced turkey
- salt and ground black pepper to taste
- Melt the butter in a skillet over medium heat. Add garlic and leek until softened.
- Stir in the flour and cook until a thick paste.
- Pour in the milk and stock and continue stirring while cooking until the mixture is smooth.
- Add the thyme and poultry seasoning and continue to cook and stir until the mixture thickens.
- Stir in the cooked vegetables and the turkey.
- Season with salt and pepper.
- Cook until heated through, stirring frequently, 5 to 7 minutes.
- Roll out the pastry dough into two- 9" circles and place one on the bottom of a 9" pie dish.
- Place turkey filling into the dough.
- Top with the other pastry dough circle.
- Pierce a few holes on the top with fork to let the steam out of the pie. (I usually like to make a "T" with the fork piercings so if I freeze this, I know it's a turkey pie!). You can freeze at this point, if you're not baking right away.
- Brush the top pie crust with a little milk.
- Bake in a preheated oven at 375 degrees for approximately one hour. (you may need to cover the edges with tin foil at the 30 minute mark, to prevent the edges from burning).
Serve, Freeze, Eat or Give.
Subscribe to:
Posts (Atom)